Happy Sunday, cats! How was your week? Here, it has been another fairly busy week, and I am also preparing to speak at an online conference next week (no pressure!). We’re also going to host an event for International Women’s Day on Friday afternoon – so, plenty to do! I haven’t been feeling like trying new recipes, but while I was making my cabbage soup for the weekend, I noticed I had a lot of cabbage so that’s when I decided to try the Roasted Cabbage Steaks by EatSomethingVegan. They didn’t disappoint! Extremely easy to make and a great result. Definitely will make it again, maybe with some basmati rice and a tempeh roast. Will let you know!
Cut the stems off the cabbage heads and then cut each one in half, then in half again. You should have four flat discs of cabbage that are about ¾ to 1 inch thick from each head. Place the cabbage steaks on a baking sheet that is lined with parchment paper, allowing some space between each one to even cooking.
Brush the cabbage with the olive oil, coating them thoroughly. Then generously sprinkle the salt, garlic powder, and paprika on the cabbage steaks. Flip the cabbage over and repeat, brushing them with oil and sprinkling the seasonings. Then add a pinch of red pepper flakes to each one, if desired.
Bake the cabbage steaks at 400°F for about 25 minutes, until the leaves are browned and the center is tender. Serve hot out of the oven and enjoy!
Hi my beautiful cats! I hope you are well. Recently, I haven’t been much active here and there are many reasons:
Since December, I’ve had an on-and-off cold: it seemed I got rid of it 2 weeks ago, but it came back with a vengeance. Definitely, it doesn’t help that at work we are still without heating and we are passing these bugs around with my colleagues, like playing tennis with the cold;
Despite taking all of my “concoctions” (from tea with turmeric and black pepper, to oregano oil and apple cider vinegar) I can’t quite shake this cold off and I am currently on day 4 of antibiotics – before this, I hadn’t needed antibiotics, for years;
I have let the current world events deteriorate my mental health: I am struggling to understand the people defending the criminal actions of the Israeli government and I am really losing hope in the human species. All the NATO/Russia is also not helping.
However, here I am today with some comfort food – I had a single eggplant waiting to be used in the fridge and this Spicy Eggplant Pasta by ConnoisseurusVeg was exactly what I needed.
3 tablespoons olive oil, plus more if needed, divided
1 medium (1 pound or 450 gram) eggplant, salted if necessary, cut into ½ inch cubes
1 medium onion, diced
5 garlic cloves, minced
1 (14 ounce or 400 gram) can diced tomatoes
1 cup canned crushed tomatoes
3 tablespoons capers
1 teaspoon crushed red pepper flakes, or to taste
½ teaspoon salt, plus more to taste
½ cup chopped fresh basil, plus more for serving, optional
¼ cup chopped fresh parsley, plus more for serving, optional
Black pepper to taste
Instructions
Bring a large pot of salted water to a boil. Add the pasta and cook it according to the package directions, until al dente. Drain the pasta into a colander when it’s finished cooking.
While the pasta cooks, coat the bottom of a large skillet with 2 tablespoons of olive oil and place it over medium heat. Once the oil is hot, add the diced eggplant in an even layer. (Notes 1 and 2)
Cook the eggplant for about 10 minutes, flipping the pieces only once or twice, until they’re browned on multiple sides.
Remove the eggplant from the skillet and transfer it to a plate when it’s finished browning.
While the eggplant cooks, coat the bottom of a large pot or skillet with the remaining 1 tablespoon of olive oil and place it over medium heat.
When the oil is hot, add the onion. Sweat the onion for about 5 minutes, until soft and translucent, stirring frequently.
Add the garlic and cook for 1 minute more, until very fragrant.
Stir in the diced tomatoes, crushed tomatoes, capers, red pepper flakes, and ½ teaspoon of salt.
Bring the sauce to a simmer, and allow it to cook, uncovered, for about 10 minutes, until it thickens up a bit. You can add a splash of water if it becomes too thick.
Stir the eggplant into the sauce and let the mixture simmer for about 5 minutes more, until the sauce very thick and the eggplant is very tender.
Add the cooked pasta, parsley and basil to the sauce and stir everything well to distribute the ingredients and wilt the herbs.
Remove the pot from heat and season the pasta with additional salt and black pepper to taste.
Divide onto plates and serve. Sprinkle with additional parsley and basil, if desired.
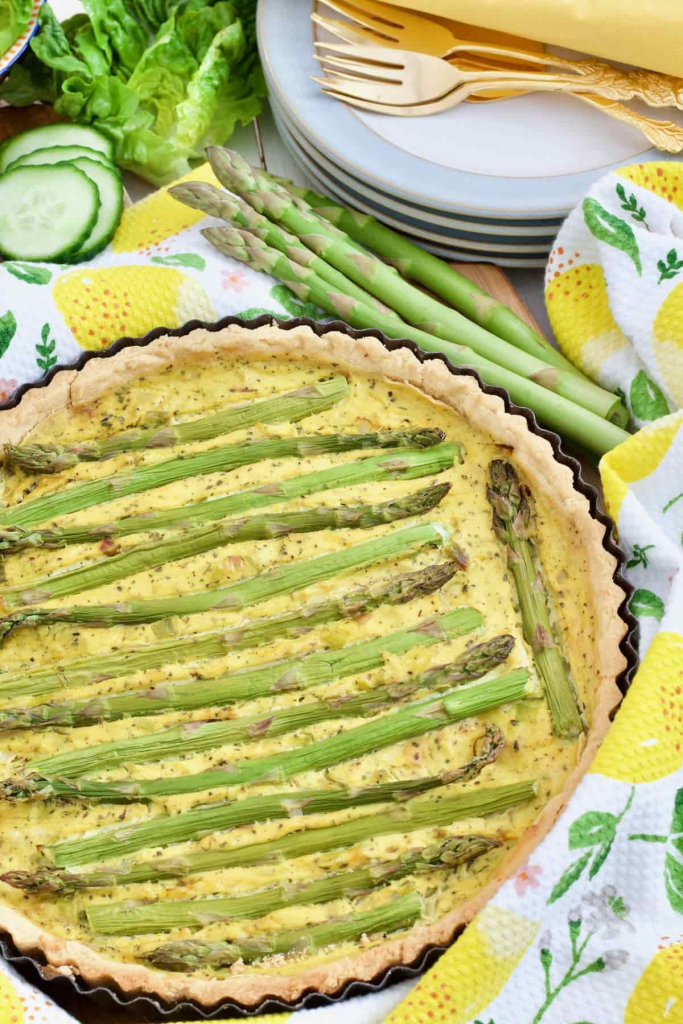
Hello pretties! How are you? Are you having a nice weekend? I have been enjoying a work night-out on Friday (having nice colleagues makes such a difference!), then yesterday my partner’s family had a Secret Santa party which was really good fun and lovely atmosphere (although, as with all the family reunions, I need A LOT of mental preparation – introvert for life…). A very busy, but great weekend! To close this, I wanted to share a recipe I followed this week for a Vegan Quiche with Asparagus by Jo’sKitchenLarder – this week I was short on time so I used puff pastry instead of making the pastry.
125 g unsalted vegan block butter cold and cut into cubes, I like Flora Plant
good pinch of salt
2 tablespoon cold water you might not use all of it, depending on your flour
Filling
360 g leeks weight after trimming, cleaned and thinly sliced
350-400 g asparagus woody ends discarded, I used 15 thin asparagus spears for my quiche
300 g silken tofu drained
100 ml soya cream or any plant based cream of choice
2-3 garlic cloves peeled and finely chopped/minced
1 tablespoon (heaped) cornflour or potato starch
½-1 teaspoon black salt (kala namak), regular salt can be used here instead, adjust saltiness as per your liking
½ teaspoon onion powder
½ teaspoon garlic powder/granules
¼ teaspoon turmeric for colour
1 teaspoon dried oregano
2 tablespoon nutritional yeast
Instructions
Pastry
Put flour and cold butter in a bowl of your food processor and pulse until you’ve got sand like consistency. If you don’t have food processor simply use your hands to rub butter and flour together to the same effect.
Add cold water, drop at a time and pulse or mix it in gently with your hands until your dough starts coming together into a ball.
Turn it out onto a floured surface and shape into a disc. Wrap it into wrap of your choice and put in the fridge to chill for at least 15 min.
Preheat the oven to 200C/400F/Gas Mark 6.
Roll out the pastry to fit loose-bottomed tart tin (23-25cm/9-10inch). Line the tin with pastry (bottom and sides) and trim any overhanging bits with the stroke of a knife against the edge of the tin. Save excess pastry for later in case you need to patch any holes.
Line your pastry with baking paper and fill with baking beans to blind bake first. Bake preheated oven for 15min.
Next, remove the paper and beans, patch up any holes with the saved pastry (if necessary) and return (uncovered) to the oven for another 5 minutes.
Once 5 minutes is up take the pastry out of the oven and set aside as you prepare your filling. Lower oven temperature down to 180C/350F/Gas Mark 4.
Filling
Prepare the leeks by trimming the dark green tops, cutting them in half and giving them a clean to ensure there is no grit leftover in between the layers. Slice each half nice and thin.
Heat up some oil in a large frying pan and add sliced leeks followed by minced garlic. Fry them stirring occasionally until nice and softened but not too coloured.
In the meantime, put tofu in a sieve over a bowl or a sink to drain the excess water.
Next, place the tofu and all of the herbs, spices, soya cream and cornflour in a bowl of food processor and mix until nice and smooth. You can also do it by hand mashing and mixing everything with a fork, although food processr will definitely give you smoother consistency.
Once the leeks are nice and soft and tofu mixture ready, mixed them togetherand and transfer into pre-baked pastry case.
Arrange trimmed asparagus spears on top as per your liking and bake your quiche in preheated oven (temperature lowered to 180C/350F/Gas Mark 5)) for approx. 30-40 minutes until set.
Take the quiche out of the oven and let it cool down in a tin for a bit before slicing and serving.
Happy Sunday, my beauties! You might have seen that last week I shared some December Affirmations, just some words or phrases to give you a bit of respite from not only the Holidays madness, but also to give our minds some rest from what is happening (and it has been going on for more than 2 months in Gaza). I hope that seeing these words is helping you cope, even just a little bit better.
3/4 cup chopped chocolate bar or chocolate chips divided
1/2 cup plant-based mini marshmallows* (about 3-4 per cookie)
Instructions
Preheat the oven to 350F and grease or line a baking sheet with parchment paper. Combine the ground flax with the water in a small bowl and mix well; let sit for 5 minutes, to thicken.
Add the butter, brown sugar, and cane sugar to a large bowl and use a hand mixer (or bowl of a stand mixer) to cream them together until smooth, 2 to 3 minutes. Add the thickened flax seed and vanilla to the butter mixture. Mix again until combined.
Add the flour to the mixing bowl and sift the cocoa powder on top to prevent clumps. Add in cornstarch, baking soda, and salt to the bowl and mix well with a spatula. Add 1/2 cup of the chopped chocolate to the bowl and fold into the dough.
Divide the dough into 12 equal balls, roughly 3 tablespoons each. Place each cookie dough ball 2” apart on the baking sheet, then top with the remaining 1/4 cup of chocolate, pressing it into the top of the ball slightly so it sticks. Do not flatten the cookies on the baking sheet as they will spread when they cook.
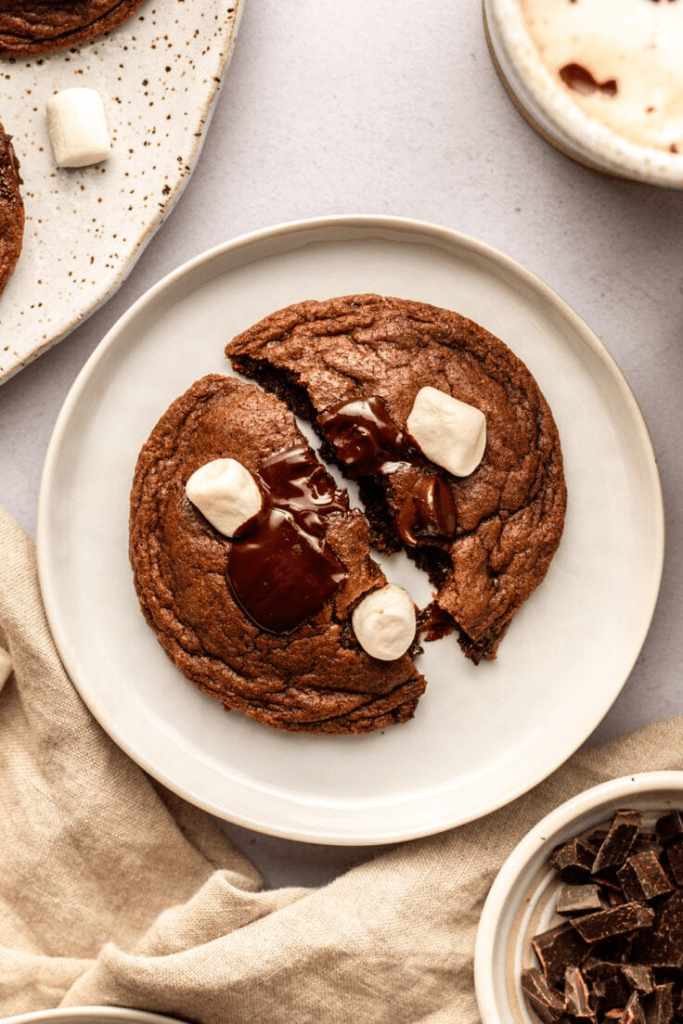
Bake for 7 minutes, until the cookies have spread and are puffy. Remove the cookies from the oven and quickly press in 3-4 mini marshmallows per cookie; it’s ok if they flatten slightly as you decorate. Return the cookies to the oven and bake for an additional 2 minutes, to set the marshmallows.
Remove the cookies from the oven and let sit on the baking sheet for 10 to 15 minutes, to allow them to set. Use a spatula to transfer the cookies to a wire rack and let them cool completely (or enjoy warm!)
Let the chocolate fully cool and solidify before storing. Store cookies in an airtight container at room temperature for up to 4 days, or in the freezer for up to one month.
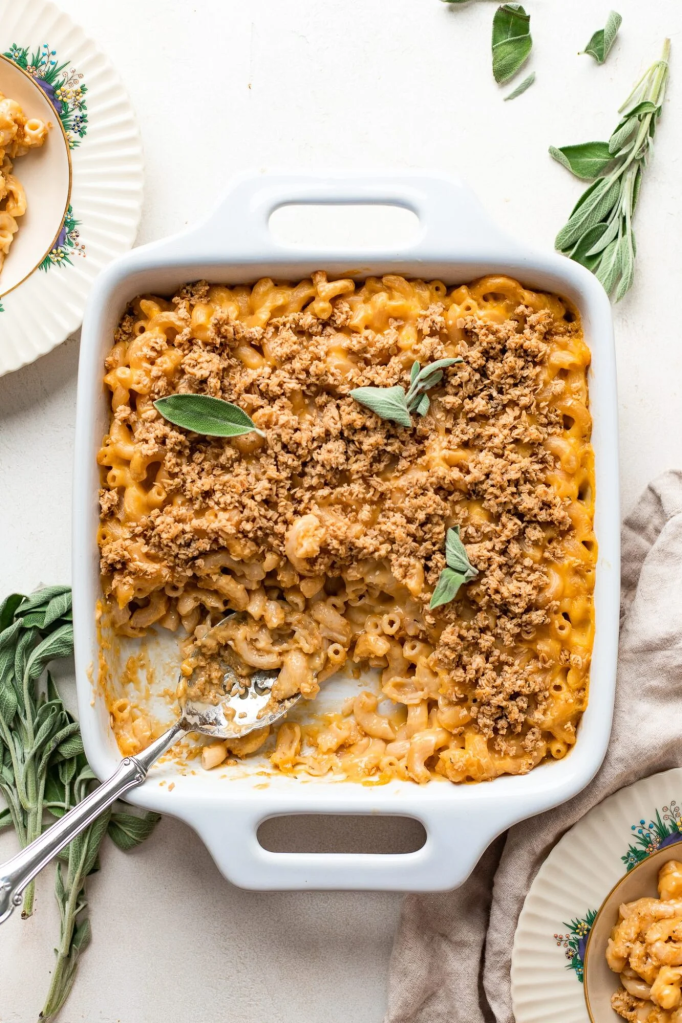
Happy Sunday, dear cats! How has the past week treated you? Here it has been really cold: you know me, I love the cold, but the heating has stopped working in my library and it’s been really cold inside – luckily, we have quite a few portable electric heaters and we are allowed to wear hats, gloves, extra layers and have a bit more tea breaks to keep us warm. The price to repair the system is probably going to be too much for the current financial situation and this is causing stress and anxiety to my colleagues and me. It has been a long week and the whole affair just calls for some serious comfort food and what’s better than a Mac and Cheese? This 5 Ingredient Vegan Baked Mac and Cheese by TheBananaDiaries is a nice, easy, and quick recipe that will lift the spirit of anyone who eats it. Trust me! Also, I would suggest adding 1 tablespoon of mustard to the cheese sauce, I’ve tried it once and now I am adding it in most of the white sauces.
480 ml unsweetened dairy free milk (oat milk recommended), room temperature
8 ounces shredded vegan cheddar cheese
8 ounces shredded vegan mozzarella cheese
5 tbsp oat flour
66 grams salted vegan butter
Optional: 2 tbsp plain pea protein
Vegan Gluten Free “Breadcrumbs:”
45 grams rolled oats, ground into flour
66 grams salted vegan butter, melted
1 tsp dried rosemary
1 tsp dried thyme
1/4 tsp nutmeg
Instructions
Preheat the oven to 400F. Grease a large casserole dish with olive or cooking oil and set aside. Measure out all ingredients before beginning.
Bring a large pot of water to a boil. Add in the macaroni pasta, and cook until al dente, about 7 minutes. Drain the pasta and set aside. Reserve 1/4 cup of pasta water. While the pasta is cooking, you’ll make the vegan cheese sauce.
In a medium pot, heat the vegan butter until melted, then add in the oat flour. Whisk for 2-3 minutes, until the mixture thickens. Then add in the dairy free milk, along with the reserved pasta water, and whisk until combined. Allow the mixture to begin to boil then reduce the heat to medium. Add in the vegan cheeses, and whisk together on medium-low heat until the vegan cheese has completely melted into the milk mixture. This should be about 4-5 minutes. (this is where I added the tablespoon of mustard).
Stir the pasta into the cheese sauce until evenly coated. Then spoon the mac and cheese into the casserole dish and set aside as you make the breadcrumbs.
Combine the oat flour with the rosemary, thyme, and nutmeg. Whisk in the melted vegan butter, then sprinkle the oats over the mac and cheese.
Place the casserole dish into the oven to bake for 15-18 minutes, or until the breadcrumbs are lightly browned. Turn the broiler on for the remaining 2 minutes of baking to evenly brown the breadcrumbs.
Remove the mac and cheese from the oven, and allow it to cool for 10 minutes before serving and enjoy!
Happy Sunday, beautiful cats! How are you today? I hope you’re having a lovely weekend! Yesterday we started feeling some very cold weather and was happy to take out my winter boots so that I could enjoy a fresh and crisp walk to work: the view was beautiful with the clear blue sky over the hills, the light colours over the hills. For lunch, I had homemade baked mac and cheese, but more importantly, I had some delicious cinnamon rolls for breakfast. You know that I like easy and quick recipes so you might be surprised that I am sharing this with you, but listen, this is a recipe for a 1-Hour Vegan Cinnamon Rolls recipe by VeganRicha. I made it while I was cooking dinner – how great is that! So here it is.
1/4 cup (59.15 ml) aquafaba chickpea brine, (or use room temp non-dairy yogurt or 1/4 cup coconut milk + 1.5 tbsp flax meal. Though the rolls do best with aquafaba)
1 tbsp sugar or other sweetener
1 tbsp maple syrup
1 packet active yeast or 2 1/2 tsp active yeast
2 tbsp oil or use melted vegan butter. I usually use oil
1 tsp nutritional yeast (optional)
2.5 cups (312.5 g) or more flour I use unbleached white or a combination of white and wheat flour
1/3 tsp (0.33 tsp) salt
Filling:
1 to 2 tbsp Oil or melted vegan butter
1/3 cup (53.33 g) or more coconut sugar or brown sugar
2 to 3 tsp cinnamon
1/4 tsp (0.25 tsp) salt
Add some cardamom or nutmeg for variation
Instructions
Preheat the oven to 350 degrees F / 180ºc. Line a 8 by 8 inch brownie pan or 9 inch pie pan with parchment. Mix the first 5 ingredients under rolls until the sugar is mixed in. Let sit for a minute for the yeast to activate.
Add in the oil, nutritional yeast and mix in. Add 2 cups flour and salt and knead. Add more flour, few tbsps at a time to make a soft somewhat smooth dough. 4 to 6 mins.
Roll the dough out using additional flour into a 10 by 14 inch rectangle
Spray or brush oil or vegan butter on the rolled out dough. (use as much melted vegan butter as you like :)).Sprinkle sugar, cinnamon and salt evenly. Roll the dough tightly along the longer edge to make a cylinder.
Slice using a pizza cutter or floss or a serrated knife. Place the slices in a parchment lined brownie baking pan or pie pan. Spray or brush oil on top. Cover lightly with a towel and Let the pan sit near the warm oven for 15 to 20 minutes or until just about doubled. Remove the towel.
Bake at 350f / 180ºc for 21 to 23 minutes or until golden on some edges.(just about starting to get golden)
Let the rolls sit for a few minutes, while you make the icing or frosting of choice. Frost and serve.
Hello kittens! I hope you’re having a nice weekend and managed to get at least 5 minutes to do something for yourself – we’re getting into one of the busiest times of the year, we just left Halloween and preparing for Christmas (and for the U.S. cats, Thanksgiving too!). Yesterday, my town had the first Christmas event of the season and it was so crowded! Plenty of lovely handmade stuff, though, from candles, soaps, and gin (!!!). Also, I had another Taek-Won-DO pre-grading, now going for a blue belt red tag! In addition to this, with my partner, we went to his brother’s birthday dinner: always lovely to see his family but at the end of the day I was happy to go to bed. And I won’t have a free Saturday until next year. I’m already tired.
2 tsp chili-garlic sauce (sambal oelek or Sriracha)
4 cloves garlic, grated
⅓ cup warm water
For the Noodles & Vegetables
250 g dry wheat noodles (Chinese-style lo mein), soba or ramen
3 cups green cabbage, chopped
3 cups sliced mixed mushrooms
1 small white onion, thinly sliced
1 bunch green onions, thinly sliced
Optional: 250 g tempeh or tofu, cut into small cubes
1 tbsp tamari
Garnishes
green onions, thinly sliced
sesame seeds
toasted nori, thinly cut
Instructions
Make the Miso Sauce: Add all sauce ingredients to a medium bowl. Stir until smooth. Set aside.
Cook the Noodles: Prepare noodles according to package directions. Once tender, drain and set aside.
Cook Tofu or Tempeh (Optional): If using tempeh or tofu, heat 1 tbsp oil in a large pan, over medium-high heat. When the pan is hot, add the tempeh or tofu cubes. Cook for 6-8 min, breaking apart into smaller pieces, until golden-brown. Remove the pan from the heat, then drizzle over 1 tbsp tamari. Toss to combine. Transfer to a plate and set aside.
Stir Fry the Veggies: Heat 2 tsp oil over medium-high heat. Add the mushrooms, cabbage and onions. Season with a pinch of salt and pepper. Cook for 4-6 min, stirring occasionally, until tender. Add green onions, reserving some for serving. Cook for another 2-3 min, stirring often, until tender-crisp.
Add Noodles & Sauce: To the pan, add drained noodles and miso sauce. Cook for 1-2 min, tossing gently, to coat noodles in sauce.
For Serving: Divide noodles between bowls. Top with tempeh (if using), green onions, sesame seeds and toasted nori. Drizzle more chili-garlic sauce over top, if desired.
Hey, cats! How are you these days? Here it’s been a good week – I was working yesterday but I went to deliver a course in one of the nearby libraries and it’s always a pleasure going there, the drive there is very scenic and yesterday could have not been a better day to go as it was a cold, clear-skyed day, with all the autumnal colours around! Really a beautiful view that made my day, one of those views that recharge the spirit. When I came back I felt energised and managed to do quite a lot of things – feeling very positive. And these Almond Flour Cookies by ElaVegan were just what I needed for this lovely day!
First, preheat the oven to 350°F (175°C) and line a cookie sheet with parchment paper.
Then, mix the almond flour, baking powder, and sugar in a medium bowl (or a food processor) until there are no lumps.
Add the almond butter (or nut/seed butter of your choice) and mix well. If the dough is dry, which it likely will be, add a tablespoon of water and mix again.If it’s still too dry, add more water, a teaspoon at a time, mixing thoroughly in between.
Fold in the chocolate chips, reserving a few for the top, then use a small ice cream or cookie scoop or tablespoon to divide the dough into 6 cookies.
Spread the cookies across the prepared baking sheet with space in between, using your fingers to flatten them gently, and press the reserved chocolate chips into the top.
Bake the cookies for 11-12 minutes until they’re lightly browning on the edges. They will be soft right out of the oven, but firm up as they cool. Leave them to cool on a wire rack. Enjoy!
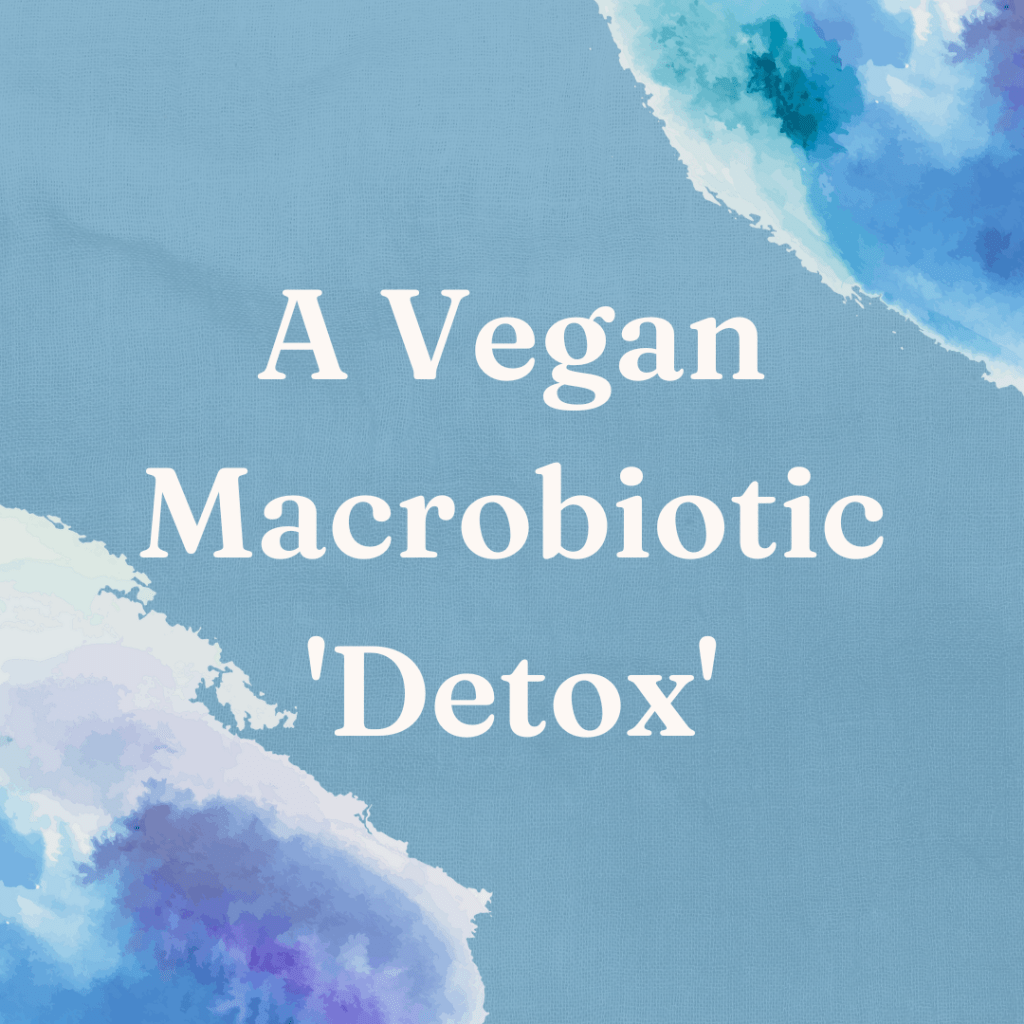
Hello kittens! How are you? It’s finally getting colder and it makes me so happy! It’s time for cozy clothes and comforting food and after the madly hot summer, Autumn couldn’t come any quicker! And while I was enjoying the mindless scrolling on Instagram of a weekday night, I found this account of a vegan macrobiotic person and she was suggesting that in order to prepare our bodies for the colder months, it would be good to do a “detox” for a week following a macrobiotic diet. Since it was ages I wanted to go back to my macrobiotic practice, I thought this would have been a good time to do that. I signed up for the detox, and decided to extend it to the whole month.
Years ago, in 2012) I attended a course on Macrobiotics and I really enjoyed it. I didn’t quite agree with the teacher of said course as he said that it’s difficult to be a vegan Macrobiotic: bizarre because Macrobiotic is very much a pescatarian diet that can easily be turned into vegan. The course itself had a nice structure with a theory part followed by a dinner and lo and behold, all the dinners had only vegan dishes! I liked the theory part, very holistic and made you understand the interconnection of how what we do and what we eat has a significant impact on our lives. After the course was finished, I tried to maintain some of the Macrobiotics principles, but I slowly lost touch with it. The occasion of this detox was the perfect chance to go back and refresh my practice.
Why have I done this? I thought “I can do the Limpia for 50 days, meaning not being able to eat chickpea flour, so I can do this”. Mmmh, well. It’s not that easy. True, I can make vegan omelets but I can’t have potatoes! Oh goodness.
This is difficult. And I’ve fallen into the temptation of chips, once a week – potatoes are a big no-no in macrobiotic! But before I talk about this experience, I’ll explain what a macrobiotic diet entails.
Principles of Macrobiotics
Macrobiotic is a philosophy that takes a lot from the principles of yin and yang. The world and everything in it need balance in order to function properly. When there is a good balance between yin and yang in an organism, then it will have a good energy. For example, people should also have a balance, but many times they might have an imbalance and be too yin or too yang. Then there are also the dichotomy of acid and alkaline and the 5 elements (Earth, Fire, Water, Metal and Wood) – if you want to learn more about all this, the Macrobiotic.org.uk website has a clear and short page on the Principles of Macrobiotic.
The very positive thing about Macrobiotics, is that it’s basically intrinsically pescatarian so it’s very easy to make it into a vegan diet.
A Lifestyle, not just a Diet
You can see that Macrobiotics is much more than a diet – it is a lifestyle. It seeks to create a balance in your life and in your body by thinking of what is your body type (are you more yin, or more yang?), and then by thinking of the characteristics of what we ingest and how we cook this food.
We should open at least one of the three main meals (breakfast, lunch, dinner) with a miso soup so to prepare our digestive system to receive the food. It shouldn’t surprise that there is also a lot of mindfulness involved in Macrobiotics because we should eat without distractions and very importantly we should chew each bite for a long time – possibly more than 20 times, until the food is smooth and the digestive system won’t have to work for too long, in doing so to make digestion easier. One “experiment” or “exercise” when starting Macrobiotics is to chew a spoonful of plain boiled/steamed whole rice for 100 times!
Main Foods for a Macrobiotic Diet
When preparing a Macrobiotic dish, another big rule is to compose the food as 1/3 cereal, 1/3 protein, and 1/3 veggies. For example, at dinner, you could eat wholegrain rice, sauteed tofu and onion, celery, carrot.
So, what can you eat?
All the wholegrains: rice, millet, pasta too if wholegrain; All veggies; All legumes (especially adzuki beans and chickpeas); Seasonal fruit; Fermented dressings (i.e.miso); Seaweed; Brine food (Olives, sauerkraut); Gomasio; Ginger and turmeric.
What can’t you eat?
White flours; Nightshades (potatoes, peppers, tomatoes, eggplant); Refined oils; Meat; Cheese; Dairy products; Tropical fruits and vegetables (bananas, avocados, mangos etc.) Coffee, tea and alcohol; Refined sugar.
In moderation
Olive and sesame oil; Tofu and Tempeh; Good quality bread like sourdough; Raw fruit; Wholegrain pasta, cous cous and bulghur; Cereal malts; Nuts.
Methods of cooking
There is some theory also on how to cook stuff. In order to maintain or alleviate the yin/yang characteristics of the foods, the best way to cook is by steaming or lightly sauteeing. Baking is another acceptable cooking method.
When preparing any combination dish using more than one ingredient (i.e. soup), we should start with the ingredients that are closer to the soil and going up: for example, the order in which we would make a soup would be to start with onions and carrots (closer to earth) then celery, cabbage, broccoli etc (above earth).
What Have I Been Eating?
Breakfast
Porridge with apples and raisins
Rice pudding with seasonal fruit and raisins
Baked oats with apples and raisins
Lunch
Wholegrain rice with veggies and hummous;
Pumpkin soup with cereals + sauteed tofu and veggies
Millet with spiced chickpeas and steamed veggies
Dinner
Broccoli soup + sour and sweet tempeh and baked onions
Miso soup + scrambled tofu and steamed veggies
Chickpeas and broccoli soup
These are just some examples of what I have been eating: there are many different things that you can do!
My Findings
The “Not so good”
I have tried to follow this detox as best as I could, although I found some difficulties: it was really difficult to let go of coffee especially because I had 3 big events just after the start of the detox and I needed all my mental faculties to organise stuff at work. The potatoes (or more correctly, the lack of) were another issue for me – as I said, I fell into the temptation of chips once a week. I love potatoes, in every form and I use them to make cozy soups as well as roasted or mashed, etc. So that was difficult, but except for the Friday chips I haven’t used any.
The “Very Good”
Despite these little setbacks, I quite enjoyed the simplicity of the dishes and I liked to think more about what I was going to make, how it was going to affect me, was I making something too yin or too yang? Did I do a lot of exercise and so I was too yang? Was it cooler or warmer outside? And so on.
The past weeks I have also used a lot of apples, a fruit of which I am not too fond, but using them in porridge and rice dishes made me appreciate them more.
Energy-wise I wasn’t totally 100%, but again I had a lot on my plate at work, so that surely impacted how I felt.
Conclusion
While I wouldn’t follow a Macrobiotic lifestyle full-time, would definitely recommend this detox. The Macrobiotic lifestyle is something that adheres to principles of balance and mindfulness, something that most of us need to lead a healthy life. Similarly to the Limpia, you can try it for a short period and see how you feel.
Let me know what you think or if you would like to see other Macrobiotic recipes!
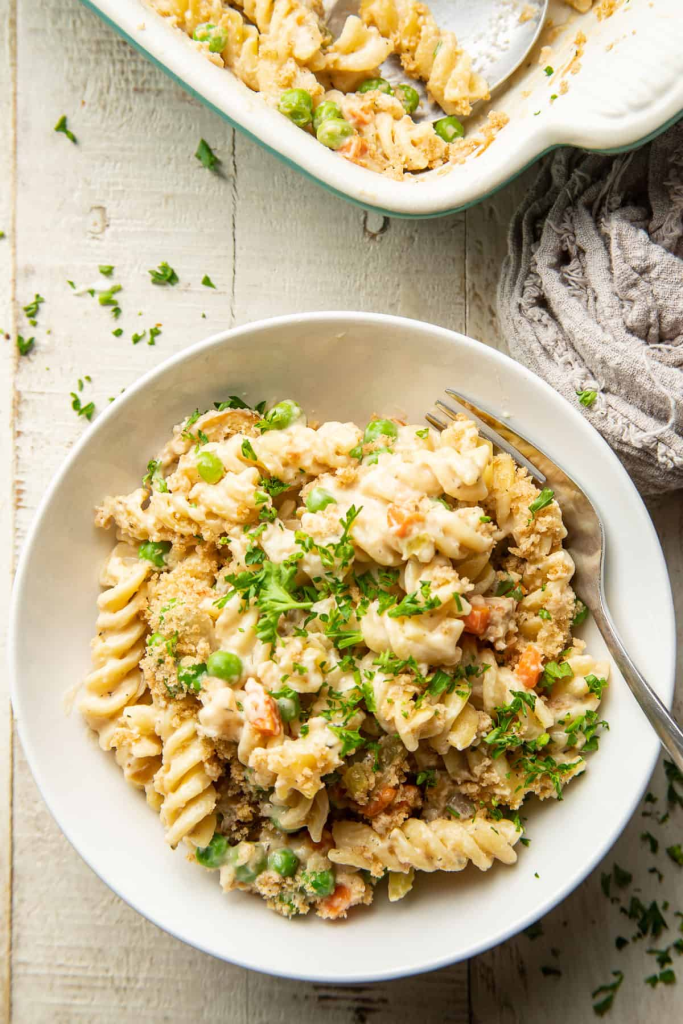
Hi beautiful cats! How are you? Are you enjoying your weekend? Last week, I finished the macrobiotic detox, but I keep making miso soup and drinking kukicha tea just to keep me right. However, I am also reintroducing the food that I couldn’t eat during the detox, i.e. pasta. And this Creamy Vegan Noodle Casserole by ConnoiserusVeg is exactly what I needed! Easy and delicious with minimum effort – perfect for a weekday lunch.
10 ounces dried rotini pasta (about 3 ½ cups of pasta)
½ cup raw cashews, soaked in water 4 to 8 hours, drained and rinsed
1 cup water
3 tablespoons vegan butter, divided
8 ounces button mushrooms, cleaned and sliced
1 medium onion, diced
2 medium celery stalks, diced
2 medium carrots, diced
2 garlic cloves, minced
3 tablespoons all-purpose flour
2 cups unflavored and unsweetened non-dairy milk
3 vegetable bouillon cubes, crushed
1 teaspoon dried thyme
1 tablespoon lemon juice
½ cup frozen peas, thawed
Salt and pepper, to taste
½ cup panko breadcrumbs
Method
Bring a large pot of salted water to a boil. Add the pasta and cook it according to the package directions. Drain the pasta into a colander when done.
Place the cashews and water into a blender and blend until smooth. Set aside.
Coat the bottom of a large skillet with two tablespoons of the vegan butter and place it over medium heat.
When the butter has melted, add the mushroom slices in a relatively even layer.
Cook the mushrooms for about 5 minutes on each side, until golden brown. Remove them from the skillet and transfer them to a plate when done.
Add the remaining tablespoon of butter to the skillet. Once the butter melts, add the onion, celery, and carrots.
Cook the veggies for about 5 minutes, stirring frequently, until they begin to soften.
Add the garlic and flour. Stir the mixture well to coat the vegetables with flour and continue cooking the mixture for about 1 minute.
Slowly begin adding the non-dairy milk, stirring in just a bit at a time to prevent the flour from clumping. Once all of the milk has been added, stir in the cashew mixture, bouillon, thyme, and cooked mushrooms.
Raise the heat and bring the mixture to a low boil. Lower the heat and let it simmer for about 10 minutes, stirring frequently, until thickened slightly. Preheat the oven to 350°F while the sauce simmers.
Remove the skillet from heat and stir in the lemon juice.
Combine the cooked pasta, sauce mixture and peas in a 2-quart casserole dish.
Season the mixture with salt and pepper to taste.
Cover the casserole dish and place it into the oven. Bake the casserole for about 20 minutes, until heated throughout.
Remove the foil from the dish and sprinkle the casserole with panko breadcrumbs. Bake 5 minutes more.
Let the casserole sit out for 5 minutes before serving.