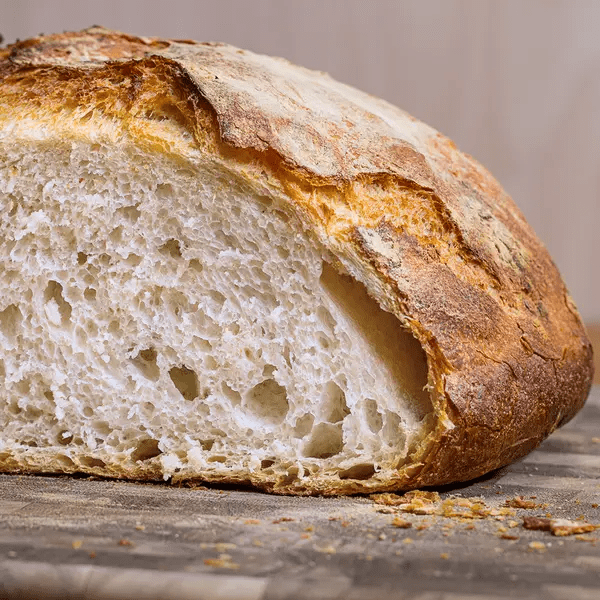
Hello cuties! I hope you are well and having a good weekend! This week went by very quickly, but it was also full of events: while on annual leave, I met with a friend and went to the sea, saw my osteopath for my neck and shoulders pain, attended the last virtual session of the academic year for my Masters course and then back to work. On my last day off, I went to the shop for some veggies and was tempted to get some bread, but then decided to make it myself so I made this Dutch Oven Bread by Tasty.co and it really didn’t disappoint: if you want homemade bread, but are put off from all the kneading, then this is the recipe for you because there is very minimal kneading involved and you get a great result!
Ingredients
- 2 cups lukewarm water (480 mL), between 90˚-110˚F (30˚-40˚C)
- 1 envelope active dry yeast
- 4 cups all-purpose flour (500 g), lightly packed and levelled off, plus more for dusting
- 1 ½ teaspoons kosher salt
- 1 teaspoon olive oil
Method
- Stir the yeast into the water and allow the yeast to bloom until foamy.
- In a large bowl, mix together the flour and salt by hand. Once incorporated, create a small well in the middle and pour in the water and yeast mixture.
- Mix by hand, wetting your working hand before mixing so the dough doesn’t stick to your fingers. The water and flour should come together and a form rough dough that pulls away from the sides of the bowl. If the dough is too sticky, add more flour in small increments, about 1 tablespoon at a time. If the dough is too dry, add more water, 1 tablespoon at a time.
- Once the dough comes together, cover and let rise for 1 ½-2 hours, until doubled in size.
- Uncover the dough and give it a few pokes with your finger. If the dough has risen properly, it should indent under the pressure of your finger and slowly deflate.
- Using your hand or a rubber spatula, start from the rim of the bowl to work the dough loose from the sides and fold it up and towards the center of the bowl. Turn the bowl 90 degrees, and repeat until all the dough has been pulled from the sides and folded towards the center.
- Once finished, cover and let the dough rise again for another 1 ½-2 hours.
- Once the dough has doubled in size again, gently transfer it from the bowl to a lightly floured surface.
- Sprinkle a bit of flour on top of the dough. Using your hands, begin to shape it into a loaf. Fold the dough under itself several times to form a ball, then pinch together the seams of dough underneath.
- Place the dough seam-side down in a clean bowl that has been lightly coated with olive oil and dusted with flour.
- Cover and let rise for 1 hour.
- Meanwhile, place a 6-quart Dutch oven (or heavy cooking pot with oven-safe lid) inside the oven. Preheat the oven to 450˚F (230˚C) with the pot inside for 45-60 minutes.
- Carefully remove the pot from the oven and place it on a trivet or heat-safe surface. (Be careful! It’ll be VERY HOT.)
- Turn the proofed dough over onto a lightly floured surface and carefully place it inside the pot.
- Cover with the lid and return the pot to the oven.
- Bake for 45 minutes, removing the lid for the last 15 minutes.
- Remove the bread from the pot and let cool for 10 minutes before slicing.
I put almost half of the slices in the freezer so that I have nicely homemade bread whenever I want it.
Enjoy!
Love,
TVCL xx

Baking bread is so rewarding! Your recipe sounds yummy. It’s very similar to how we bake bread twice a week: https://cookanddrink.org/2019/09/25/no-knead-bread-update/
LikeLiked by 1 person
You’re right – the smell of freshly-baked bread is great! Plus, you know what the ingredients are, which is a bonus 🙂 Your recipe seems delicious! I like the addition of poppy seeds and linseed – looking forward to trying it.
LikeLiked by 1 person
It’s related to the French Talmière, a crusty bread with poppy seeds, linseed, sesame seeds, sunflower seeds and honey. That’s a bit too much we think!
LikeLike